Pages

Showing posts with label Dining Room. Show all posts

Monday, December 16, 2013

Our Simplified Christmas Home Tour!

Welcome Everyone!!
This year we simplified...and I must say it has feels really good!!
By simplified, I mean, all my Christmas containers are still up in the attic!! The only things we took down were our tree and a box of lights...that's it!! 
I have been so inspired by The Nester to simplify.
 We decorated with things we already had around our home.
 We have been adding little by little each day.


At first we started off with only lights..and soon the kids started with paper snowflakes. We have all sizes!! It has been so sweet to watch them..we have square, rectangular...you name it. Our kids range from 2 yrs to 13 yrs old, and I must say they did a sweet job! For me to sit back and let them make completely decorate it and make these memories has been humbling. I did however handknit the garland, again inspired by The Nester . Can you tell I'm a big fan? :)


My mantel is simple and clean for now, and I'm sure the stockings will come out in a few days too.


This door!! Oh I love old doors, and a friend of ours let us pull it out of an old house along with some planking!! 
Have you made these snowflakes yet?! Button Bird Designs has the best tutorial! We made a few of these beauties..so easy, so fun!


This is what our Hot chocolate & Cider bar looked like when I first set it up...quite fun for the little ones. It took a whole day before the candy's were put behind doors. There was a certain 2 yr old who decided he could climb up and eat every single one!


One of hubby's deer came back in, after being outside on our fence for years, and was added to our Chalkboard. Hubbys deer...as in many, were band after years of hanging on our walls. they now live in the man cave. 
Hallelujah!!!! 
I love love love this chalkboard! It's been the best thing with 4 kiddos! We write each other sweet reminders, holds a bible verse for the day, and the little ones enjoy to simple doodle on it's big surface. You can find more on how we made it Here.


I set our table very simple. 
Gold chargers hold my collection of thrifted white dishes.
Napkins tucked into pockets from old jeans.. which I've slowly been collecting them over the years, and Green stemware for everyone including the little ones. At our house we always drink out of pretty stemware. Sometimes kids come to our home and will look at me so surprised as I hand them water in a pretty glass. Yes, my kids have broken many over the years..and that's where we can take the opportunity to teach them that they are only things.


Our chandelier was a fun rescue project. You can read more about it Here. More on adding the pretties to come! I love it! Rust with a bit of Glam...YES!!
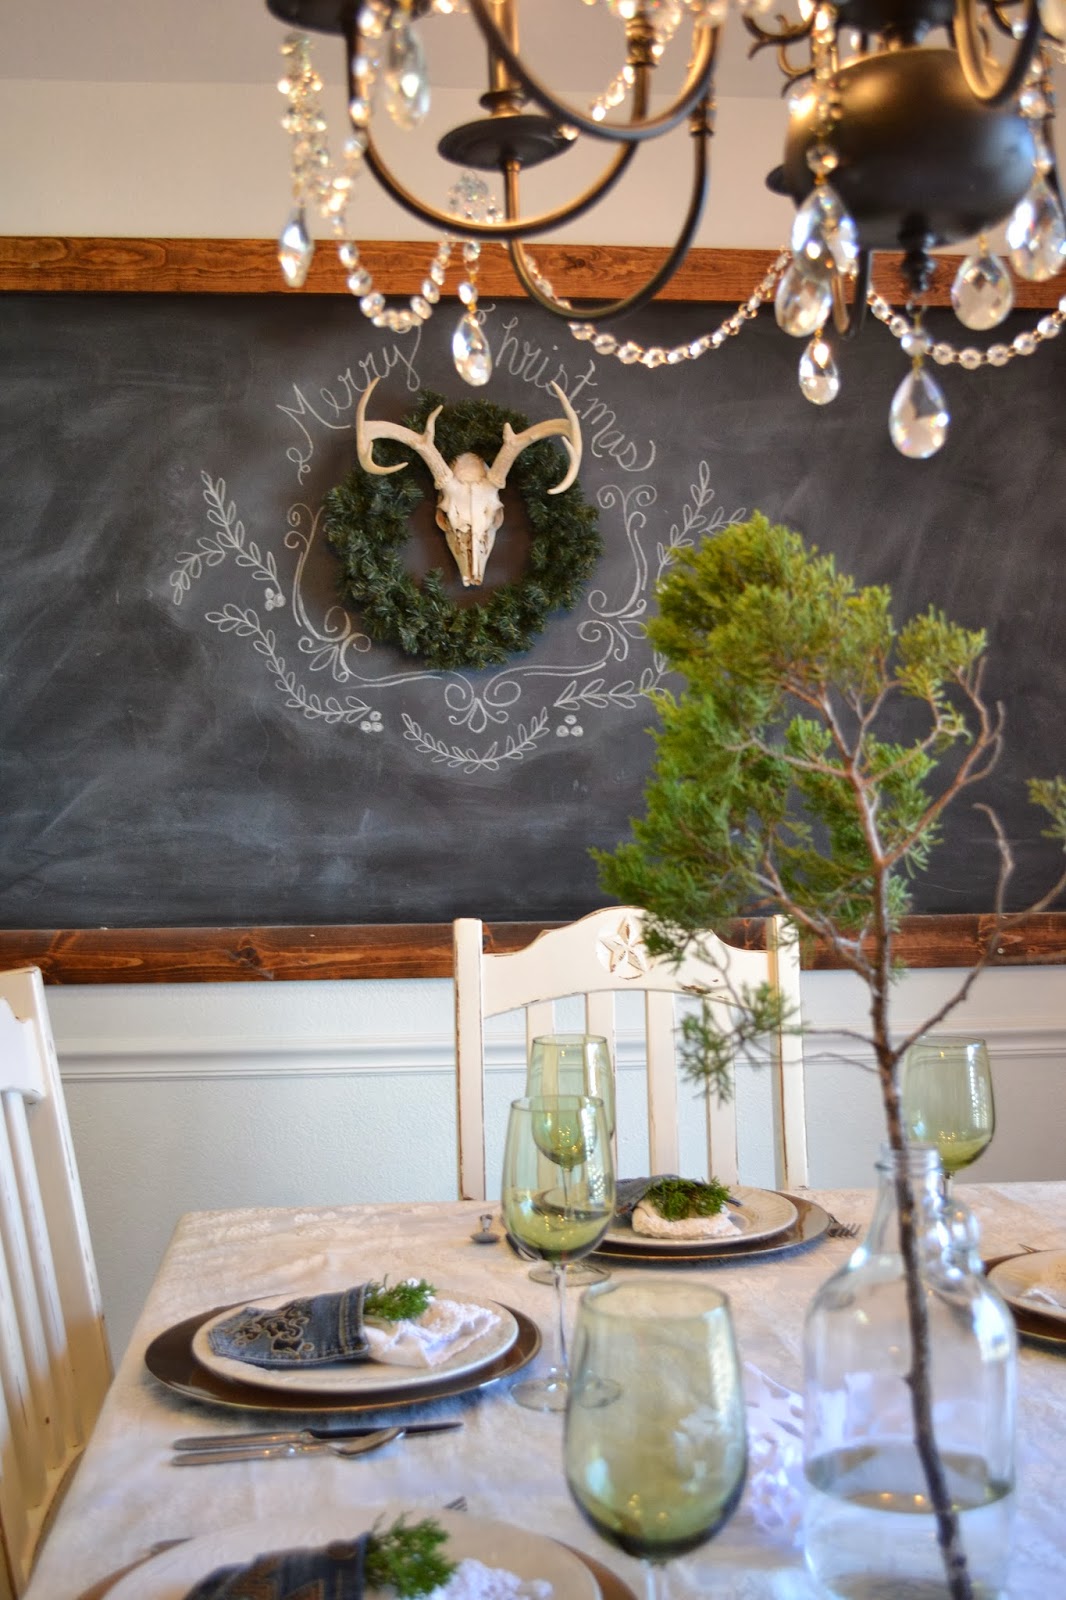

A few little cedars are here and there in our house..we cut them down at our sweet little cabin. 
Do you have a little getaway? Come see what we did with a teeny tiny storage building in a 4 part series starting Here. and how we turned it into a fun little getaway that is only 30 minutes away!


Opposite of our large chalkboard is another favorite of mine..Huge EAT letters made out of an old fence..more on them Here and my collection of silver platters is slowly growing too. I love patina!


Our bedroom called for a simple strand of lights. They make me smile. Our wall is filled with Shakespeare book pages..they too make me smile. 
Simplest of things right?!
If you'd like to read about them too, you can Here.


Thank you for stopping in at our simplified Christmas. 


I wish you all the most wonderful Christmas this year! 
Enjoy your families and loved ones!!

Love,
Naomi


Tuesday, October 15, 2013

Let's bring life to another light, shall we?!

...I found another great one while thrifting!
Don't let brass scare you...
Paint, I LOVE PAINT!!
Although, this one was harder to rewire (someone decided to let it sit outside)..the inside was rusted and getting new wire put in was no easy task!  Thankful hubby did that for me...he likes a good challenge!
I heart him!!
Like a lot!


Although, I liked the lighting that I had, I loved this chandelier more!!
I used Rust-oleum Metallic in an oil rubbed bronze finish. I just cleaned it up and went straight to painting it.


I have more plans for this one..more to come on that!!! :)
Some "pretties" are waiting to arrive..so excited, I thought I had ordered enough,  not at all!!
...so as I wait, I'll make you wait along side of me! 
That's fair, right?!!

 Here is the light I refinished before this one..you can find more on it HERE. 


And here is the new repurposed light!! 
Our hardware is all in an aged bronze, so it just makes more sense to keep the  lighting in the same finish.

wait..I know, it's NOT DRENCHED IN WHITE?!!

 I love it already..so until the "pretties" arrive, here is the before stage!!


Paint...the things it can do! 
Have a great day!!
Hope you are encouraged to look at something old and unloved, and make it great again!

Love,
Naomi

Wednesday, July 3, 2013

Filling them empty White Dining Walls...


If you follow me on Instagram, you know hubby received another honey do list..
This one involved helping me get materials for this sweet chalkboard!!
I love love love chalkboards..if my walls didn't have a texture, I would have painted this entire wall!
Hubby brought me a 4x8 sheet of Masonite, which I gave 3 coats of chalkboard paint. He trimmed it out  in a few 1x4's which I stained in walnut.


My mama had a chalkboard hanging in our dining room during my childhood years, which she had filled with scripture for us to memorize..I LOVE THAT!


Little one has gotten his share of chalk over the last few days too!
I also made and added some 4th of July bunting to hang throughout the house.


Another favorite in this room are my curtains! 
I hung my vintage chenille bedspreads! 
I love the unexpected, if you haven't noticed..haha.

My final dining wall is tall and I had been dreaming of making these EAT letters for this wall. 

DSC_0003.jpg (403×600)

I fell in love with them the first time I spotted them on Pinterest, along with all of you, I'm sure! 
You can read all about hers HERE
When our recent weather contained a whole lot of wind, and part of our fence needed to be replaced, I knew it would be perfect to recreate them for our space.


I love this space and this drenching in whites phase. 
Some have said I'm crazy to go to whites with 4 little ones, and for me it's actually been easier! 
Love it!!!
 I hope you enjoy your day...thanks for stopping in!

Love,
Naomi 


Wednesday, June 12, 2013

Chandelier Love!!

Chandeliers....sigh...oh how I adore them!!
I found this neglected Chandelier sitting at our local GW for $12.99!! 
I just could not leave it there. 
I had been looking for one to hang in my dinning room. 
I love to restore pieces that call out to be beautiful again!
..and this one, well it needed to be loved by me!!! :)


All the broken candlesticks and chains had to be replaced.


A good cleaning, metal primer, and it was ready for paint!


I decided to used white enamel paint.


And hubby hung it last night!!! 
I love it!!
All drenched it WHITE!!!!
...sigh..oh how I love whites!!


This place is coming together!!!
Would you have stopped to pick this piece up, had you seen it?
There are so many beautiful finds out there...
What are some of you favorite finds?

Love,
Naomi

Friday, March 22, 2013

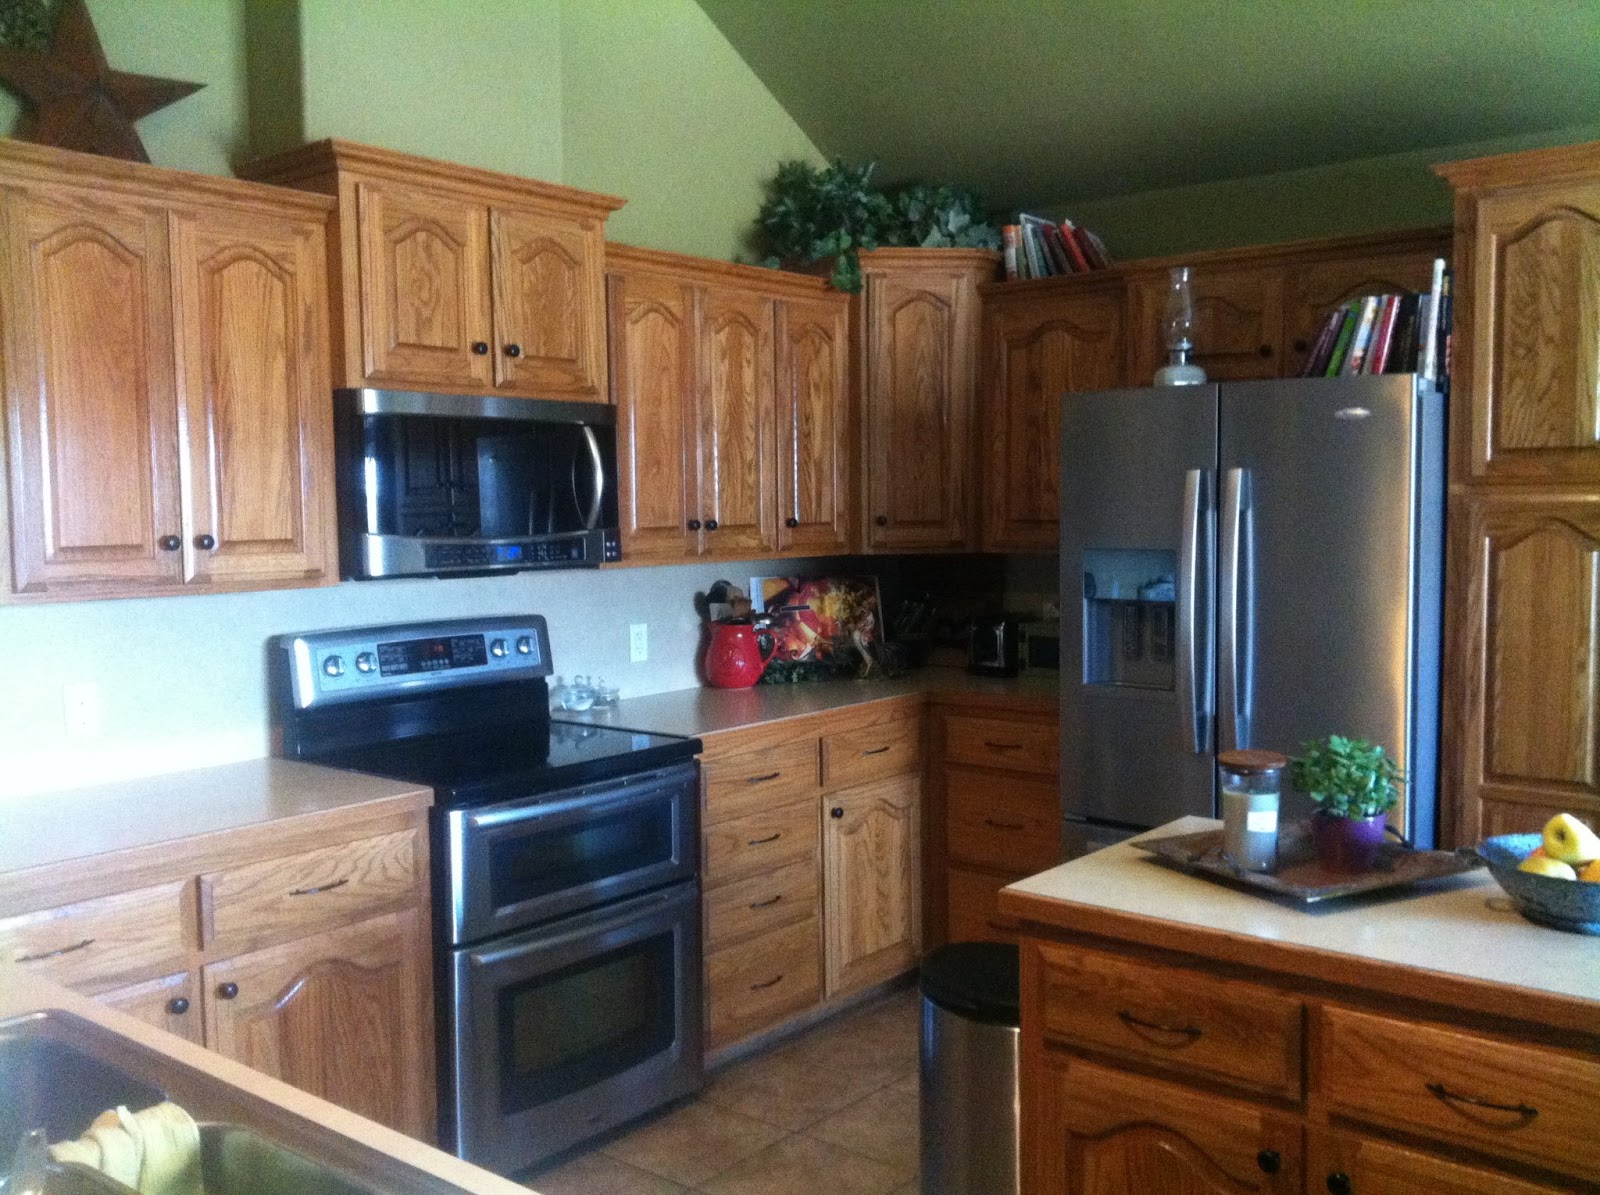
Kitchen get's drenched in Whites!


I'm so excited to share with you our Kitchen redo!!
I have been wanting to paint my oak cabinets for a long time..you know when you know it's going to be so so so much work, that you hold off till you just have to make your self take that leap? I'm so glad we finally did!!


I'm amazed every time at what paint will do.
I have always loved the look of a farmhouse kitchen...butcher block counters are a favorite of mine! Hubby was so good to me and surprised me one night when he ordered them! I so love him!
I've been asked to share on how I re-finished them, so here we go...Pic Overload on it's way!!!


Step 1: My cabinets had a thick layer of varnish on them, I began by sanding them a bit to ruff them up. This was the messiest part!! It was also where I went, oh no what was I thinking...with a family of 6, our youngest now at 21 months, you can only imagine how long this project would end up taking me. Start to finish..3 1/2 weeks! I would recommend having a sanding/prepping party..hahaha! That is really the part that takes the most time to do.
Step 2: After sanding I cleaned them and wiped them with a deglosser. It says you can skip sanding when using a deglosser, I choose to do both. Better to be safe than sorry in the long run for me.


Step 3: Primer...


Step 4: Time to add your color...we went with the same white as all the trim in our home. The sweetest hubby in the world saved me and sprayed the doors for me!!! As I was slowly painting away one day, hubby came home with a sprayer...I think he felt bad for me at the time, or he was probable thinking this will never end if I don't step in and save her, Hahaha! Did I tell you that I love him?!! He is seriously so good to me all the time!!


Step 5: Removed our old counter tops. The reason we didn't go ahead and start on bottoms was the counters needed to be removed, and we didn't want to scratch bottoms. Once they were removed, I started the whole process over again on them.


Step 6: We added a bead board backsplash! One of my all time favorites!


Step 7: Hello beautiful butcher block counters!!! Hubby ordered them from Lumber Liquidators. They come unfinished, so after hubby cut them, we sanded and sanded once again. We decided to stained them, then added a butcher block oil/sealers on all sides before installing them.


What use to be such a dark space is now light and bright, just what I needed! I used the same white, different sheen, on our walls as well. Our dining side is still a work in progress! My goal is to fill our wall with a collection of favorite plates, change out our curtains.  I am so in love with my home again. Our main space is now drenched in Whites!!


It feels clean, a new uncluttered space!  My heart is happy!!! It was a lot of work, but it was so worth it!!
Before I go here is a before and after for you...


Paint can completely change the feel of your space!
Thanks for stopping in...

Love,
Naomi
Tuesday, January 8, 2013

Dining Chair Makeover!


I'm in the process of bringing whites into our house...today I finally finished our dinning chairs! Let me just tell you...
..IT TOOK FOREVER!!  I've grown tired of all the wood in our house. Wanting to drench our home in all whites is my mission, Remember?!


Our dinning set is completely rustic...most of our house is furnished in rustic pine furniture. Although I still love this style, it is dark and looking sad to me lately. I'm craving light & bright! I love pine...it's forever forgiving when you have 4 kiddos running around. It only gets better with age! You can slather it in a zillion coats of paint and it's forever beautiful. Well that's coming from a girl who loves all things rustic anyways!! 


I started by sanding...all 8!  I figured this would be a simple, quick project. Hahaa..glad  I thought that then, I may have never started. Many days of 1 coat at a time during nap times..each chair took 3 coats (using paint with an added primer)..it's like  painting a chair 24 times...now you see why this was a never ending project? 


I think those projects that take so long seem to be the ones that are most rewarding. I love them again!!


I used the same paint color as I used for our cabin kitchen (Cream in my coffee). It's my favorite!! The seats were stained with walnut...I love the combination of the 2! Since I love all things rustic, they received some fun distressing! 

I love how they turned out...it's already feeling brighter.


For now, our home is one step closer to being completely drenched in whites. It's a bit overwhelming to think of all that needs to change to get the look I'm craving. One project and a gallon of paint at a time.  
Thank you for stopping in...I hope you have a wonderful day!!

Love, 
Naomi